I have worked with computers almost every day since I started my first job in 1995. I’m aware that this isn’t the case for everyone, and that I inevitably have a tendency to gloss over certain technical details when explaining DNA Painter to people. This article is an attempt to correct this, with a guide to every step involved in creating a chromosome map and painting a match onto it.
This was inspired by a note that DNA Painter user Gary Buck provided a couple of years ago to help explain the steps to some frustrated users. Many thanks Gary!
Alas, I will undoubtedly have overlooked some details. If you get stuck or have questions, please email me! I’ll tag any other beginner guides in this series and they will be available on this ‘every step’ posts page.
Before you start
You will need to have registered for a free account at DNA Painter before you can create a chromosome map. If you haven’t already done this, instructions are here.
It’s also worth considering the purpose of a chromosome map. For more on this topic, please read my recent blog post Why map your chromosomes?
Step 1: Create a chromosome map
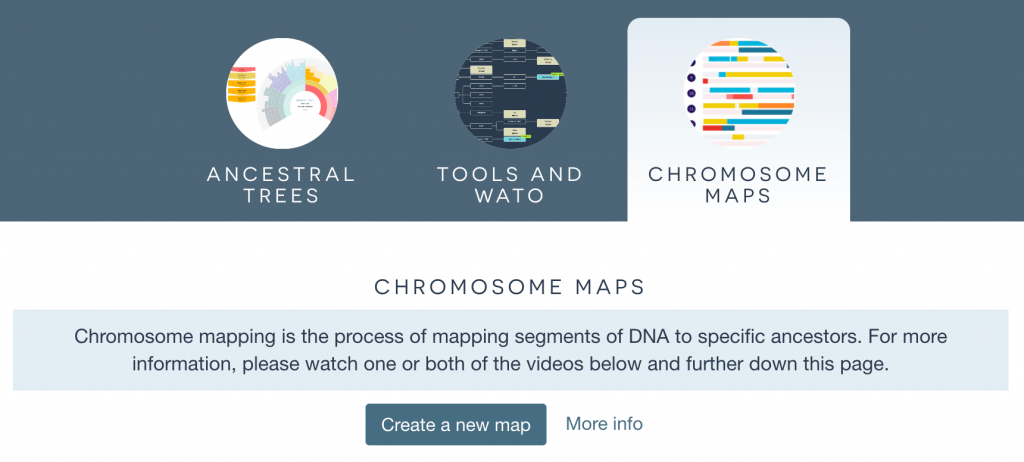
- Sign into dnapainter.com with your username and password
(if you prefer, you can use your email address instead of your username) - On the homepage, click ‘Chromosome Maps’, and then click the ‘Create a new map’ button
Step 2: Name your map
- Enter your name, specify your gender in the dropdown and click ‘Save and start painting’
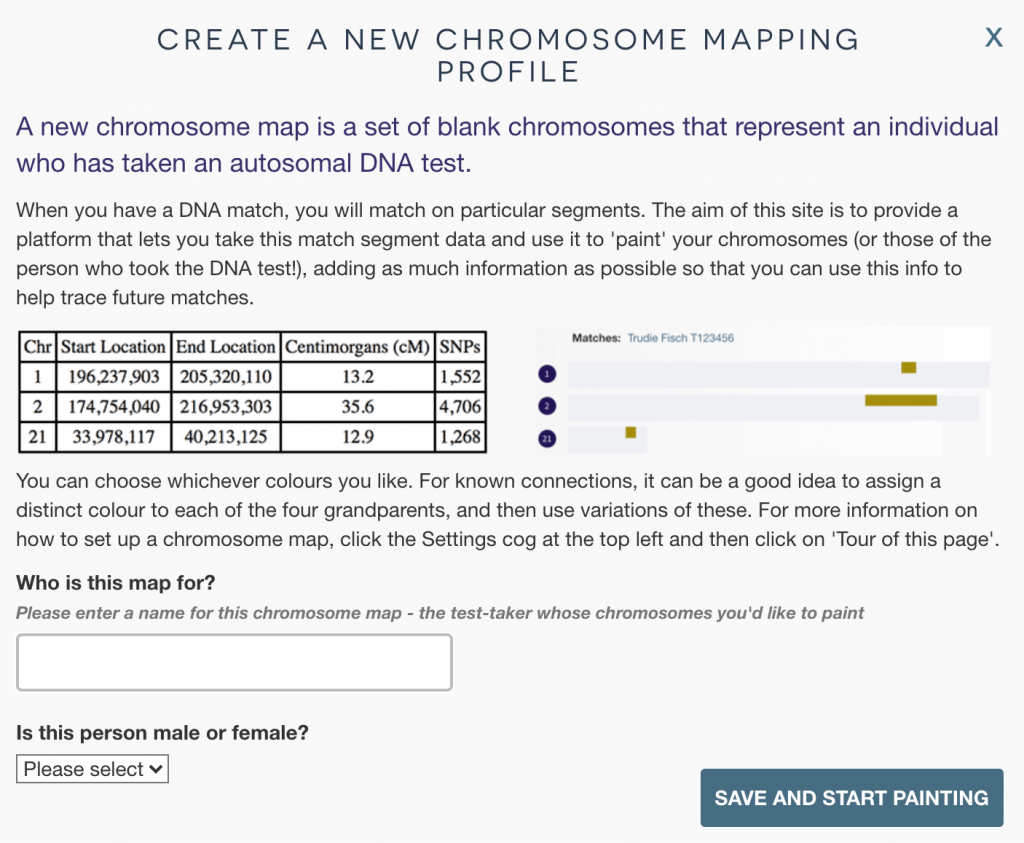
If you need to change or edit the name later, you can click on the name to edit it. When you hover over the name, a box will appear around it, and when you click, the text will become editable. You can save your edits by clicking anywhere else on the page.

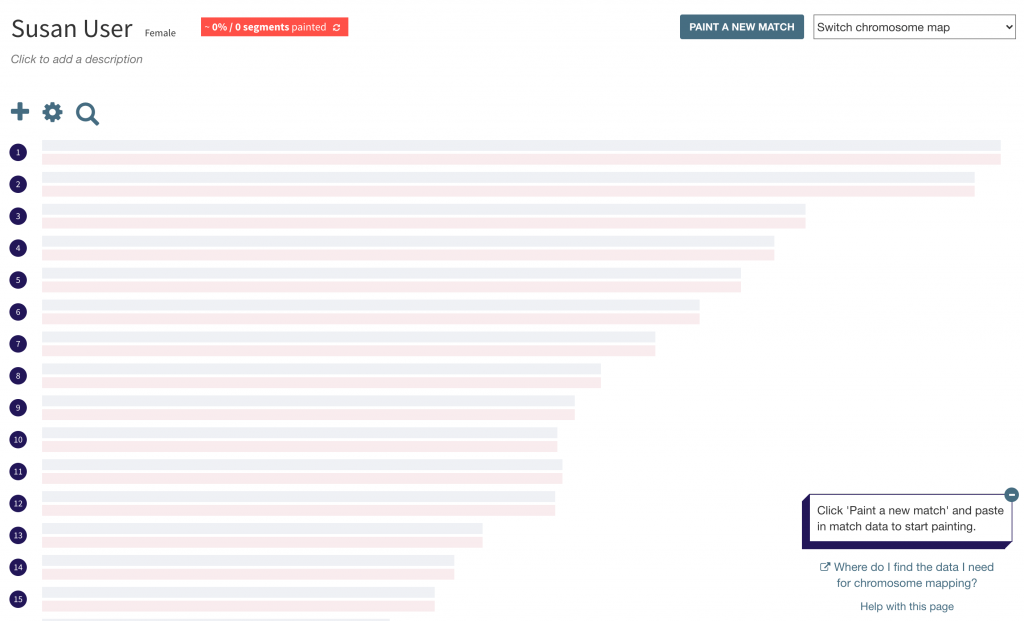
You will now see a set of chromosomes. These represent you. For each numbered chromosome, there are two copies:
- one representing the chromosome you inherited from your father
- and the other the chromosome you inherited from your mother.
If you’ve specified your gender as female, there will also be two copies of the X chromosome, one representing the X chromosome you inherited from your father and the other representing the X chromosome you inherited from your mother.
If you’re male, you have just one X chromosome, inherited from your mother. The Y chromosome is inherited along one line and mutates very slowly, so is not therefore useful for chromosome mapping.
An important clarification
You will not be uploading any DNA itself, or otherwise ‘putting yourself’ into this map. Chromosome mapping uses the locations of your DNA that you share with other identified relatives, so the information we’ll be adding isn’t ‘DNA data’; instead, it’s just simple coordinates showing the location of each segment you share with a match.
Step 3: Get the data for a match
You are now ready to paint your first match. This means that you’re ready to take the DNA that you share with a match and assign it to the ancestor you believe you inherited it from.
Where to find a match
But who? First of all, to do this you need a DNA match from a match list where you have access to segment data. If you tested at 23andme, FamilyTreeDNA or MyHeritage, you can just go there to your match list.
If you tested at AncestryDNA or LivingDNA and have not yet transferred your DNA, you will need to transfer to another provider with segment data in order to find a match to paint. MyHeritage, FamilyTreeDNA and Gedmatch all accept transfers or raw DNA. Information on how to download and transfer your data from the various sites is available on this help page.
Choosing a match
Ideally, the people you paint will be those where
- you can identify the genealogical connection, and
- you’re related via just one grandparent
If you can’t identify anyone, just choose your biggest match.
Getting the matching segments
You now need to get the data for your chosen match. Testing sites have different methods for getting this data, and some make it easier than others. Each of the following methods is described in detail with screenshots on the help page Where do you find the match data:
- 23andme: Enter your name and your match’s name on the Advanced DNA Comparison page and click the ‘Compare’ button
- FamilyTreeDNA: Select your match’s name on the Chromosome Browser page and click ‘Compare relationship’
- Gedmatch: Enter your kit number and the match’s kit number in the ‘One-to-One Autosomal DNA Comparison’ tool and click the ‘Compare’ button’
- MyHeritage: Click the ‘Review DNA match’ button for the match you want to use. Then scroll down the page to the Chromosome Browser section, click ‘Advanced options’ and then click ‘Download shared DNA info’
What do the match segments look like?
For 23andme, FamilyTreeDNA and Gedmatch, the result will be a table of data that looks something like the image below.
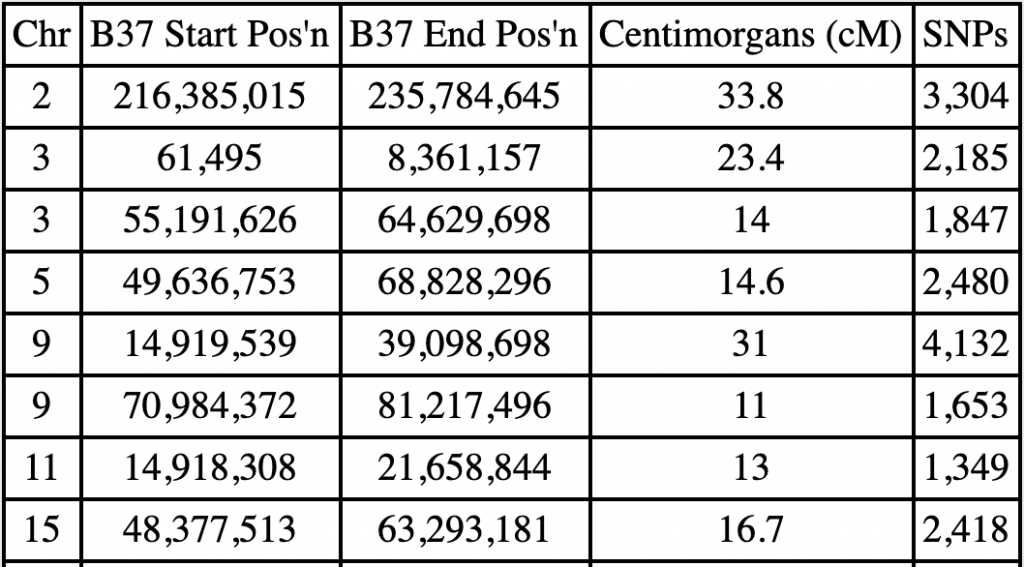
For MyHeritage, it will be similar, except the data may be in a comma-separated values (CSV) file, which you can open in Excel or Google Docs, or alternatively just in a text editor like Notepad.
Step 4: Put that data into DNA Painter
Painting a match
Wherever you got the data, the process of getting it into your chromosome map is the same: you just copy and paste the text into the ‘Paint a new match’ form:
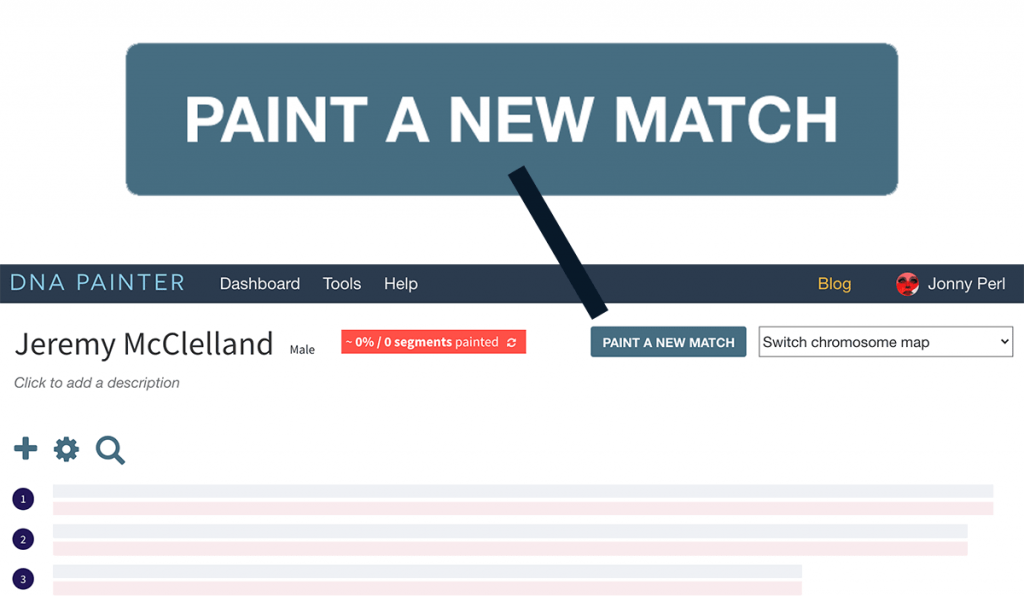
After you click the button, a small overlay will appear with a large box in which you can paste your segment data.
The ‘Paint a new match’ form is generally able to figure out which parts of what you paste in is actually segment data, so you can include other information from the page and in most cases it will be safely ignored.
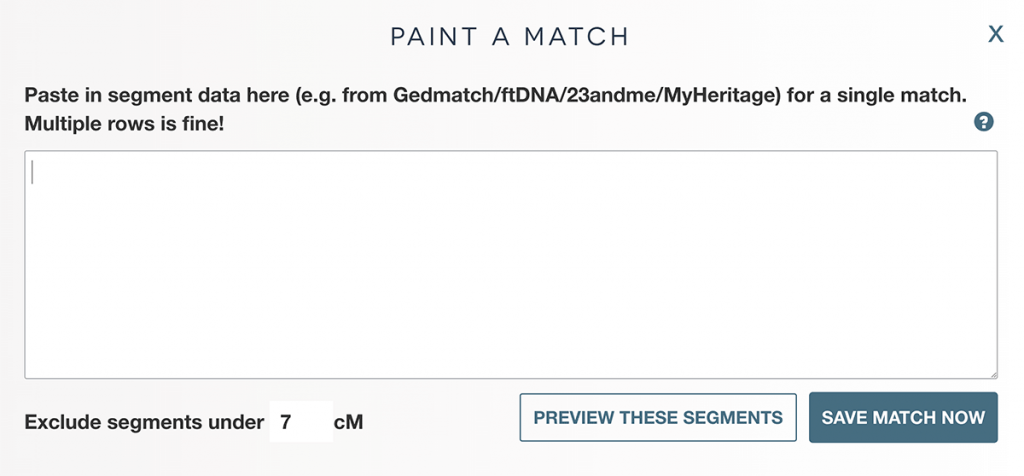
Some methods for selecting, copying and pasting:
- First click on the page or data to make it active
- The keyboard shortcut CTRL-A (command-A on a Mac) can be used to select all the text on a page.
- Or you may prefer to select data manually with your mouse.
- To copy the data, you can either use the keyboard shortcut CTRL-C (command-C on a Mac), or right click and select ‘Copy’ from the context menu.
- After you’ve copied the data, click within the white text area in the form, and paste
- You can now paste the data in using CTRL-V (command-V on a Mac), or ‘Paste’ from the context menu.
- If you’re on a Mac and have not set up right-clicking, you can reach the menu by holding down the control button and clicking.
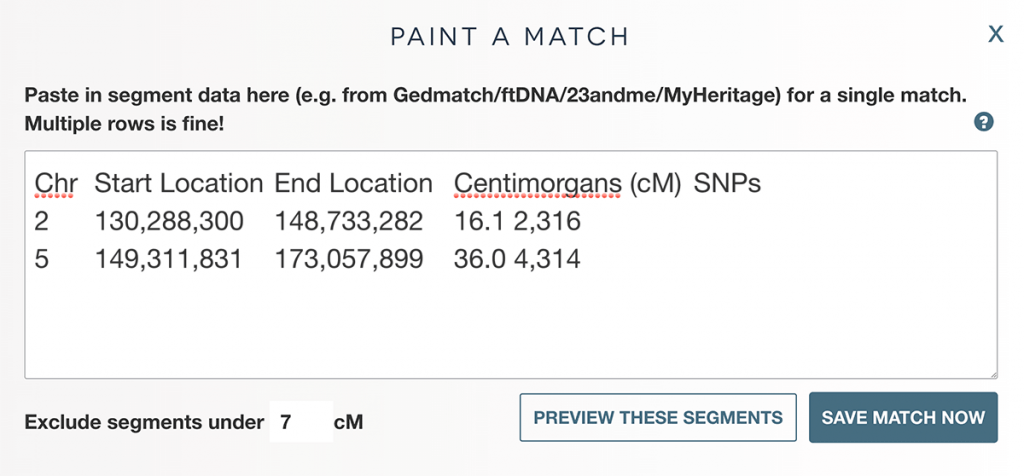
You will see two buttons on the right. These provide the option to preview these segments or save the match. Preview just means view the segments overlaid on your existing map. This can be a useful way to compare an unknown new match to segments you’ve already painted. After previewing, you will have the option to save the match.
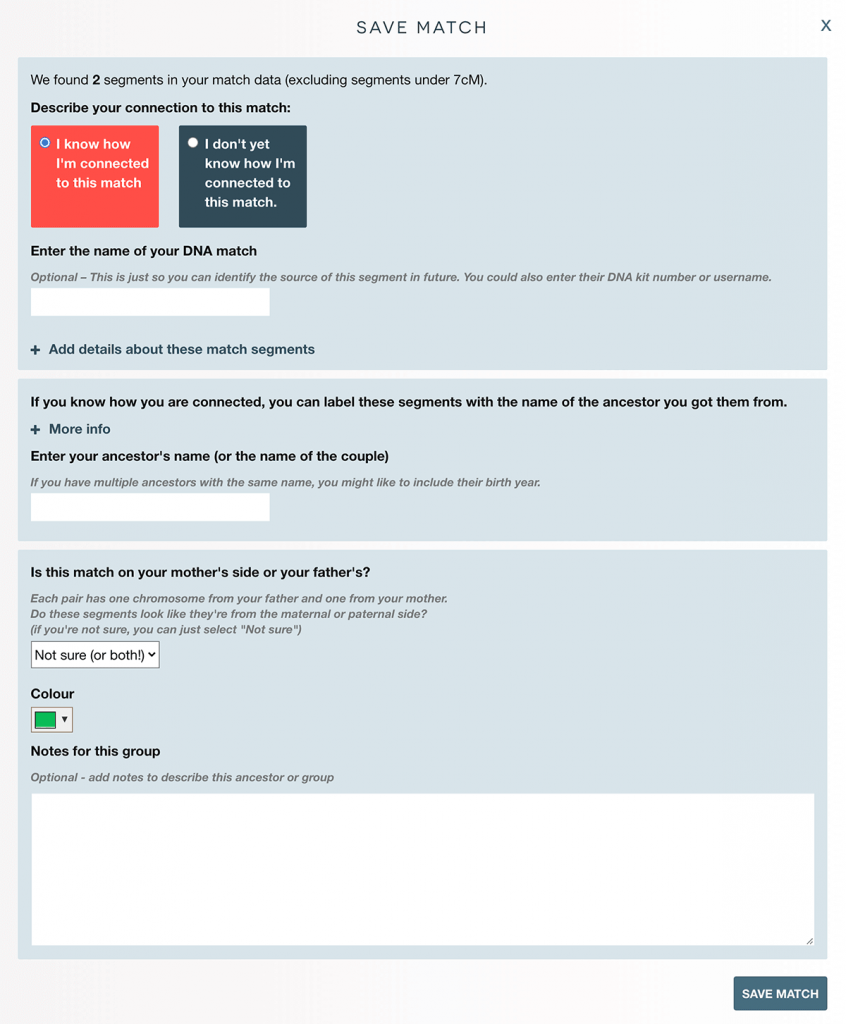
‘Save match now’ does what you would expect, but the site does need some additional information from you in order to do this.
Save match now
The form will ask you to confirm the following:
- Whether you know your connection to the match or not
- The match’s name
- The name of the ancestor or ancestral couple from whom you can deduce you inherited this DNA
- Whether this ancestor is on your mother’s or your father’s side
- A colour for the newly added ancestor/group. The site will suggest a colour randomly.
You may be wondering how you would figure out the name of the ancestor or ancestral couple. It’s very important to get your head around this, and the concept is explained in this part of my recent blog post.
Some additional notes
If you selected ‘I don’t yet know how I’m connected’, the Ancestor field will be called ‘Group’. You might for instance map all matches who seem to share ancestry from a specific area or country.
It’s important to remember that once you’ve painted a match, the ancestor or group you’ve created will be available for you to choose in a dropdown.

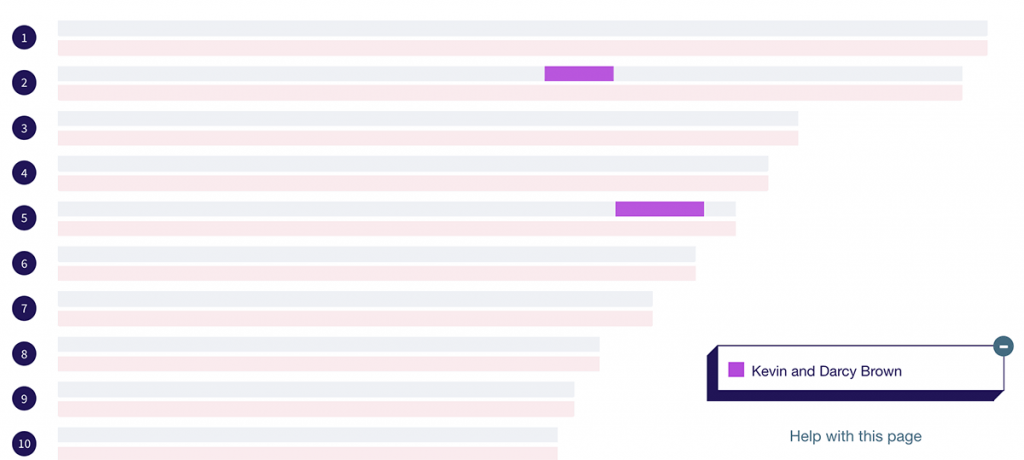
That’s it! This image shows a match I’ve managed to trace to a descendant of Kevin and Darcy Brown. I told DNA Painter that these were my paternal ancestors, so the segments are painted on my paternal chromosomes.
Step 5: Try painting a match again!
The power of chromosome mapping comes in comparing matches. I would therefore encourage you to paint all the known matches for whom you have segment data (that is, those who have their DNA on sites other than AncestryDNA and LivingDNA).
Good luck and I hope you enjoy the process. If you’d like to experiment, there is a ‘playground’ for DNA Painting: the example chromosome map. You can make any chances you want to this map. They will be removed after you refresh the page, but it can be a fun way to experiment with the site’s features.
If any part of this guide is confusing, I would be very grateful if you could email to let me know. I hope to produce some videos in the near future to help out more.
Contact info: @dnapainter.bsky.social / jonny@dnapainter.com
